Basic instructions for using JFilament3D
Installation instructions are on the download page. This page goes through an example of starting JFilament3D and tracking a simulated 3D filament image. Also included are basic descriptions of the buttons and parameters.
- Getting Started
- Adding a snake
- Deforming and Tracking
- Keyboard Shortcuts
- 3D controls
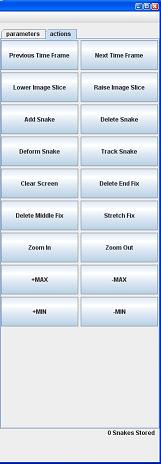
- Action Buttons
- Parameters
- Menu Items
- Troubleshooting
Getting Started
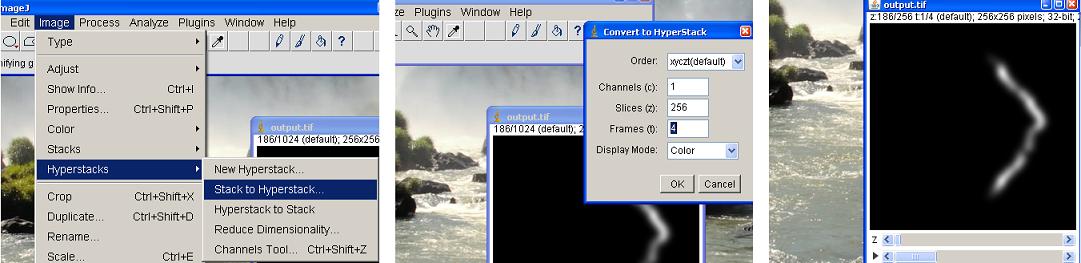
JFilament3D uses an ImageJ "HyperStack" to distinguish time steps between depth slices. ImageJ allows you to open an image and convert it to a hyperstack.
The layout of JFilament3D is broken into two sections; the image section and a control section.
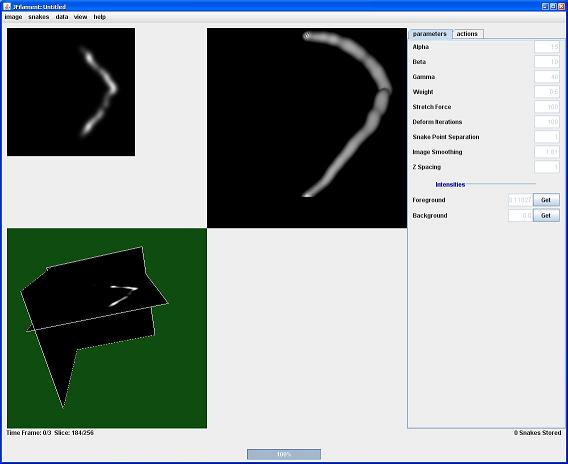
The image section is broken into 3 panels. To enlarge the 3rd panel, select the '3D sections' from the views menu (alternatively, use the "v" key to cycle through panels).
To add a snake click on "Add Snake" button then place points by left clicking on the Image. You can change the height/slice with the previous slice/next slice buttons while adding points. Snakes can also be added using the 2D image panel. To finish the snake, right click.
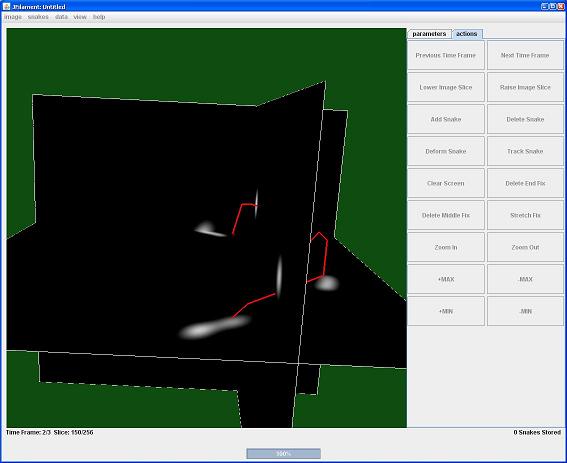
Once you have finished the snake you can deform the snake by clicking "Deform Snake." This will cause the snake to change shape to conform to the image and the internal energy determined by the parameters.

The above image is intended to show a snake initialized near a simulated filament that deforms to the final shape. The closer the snake is to the actual result, the faster results can be obtained. Manual editing controls have also been included.
In order to propagate the snake to the next time frame, click "Track Snake." The image will change to the next time frame; the snake will be copied to the new frame where you can continue to deform the snake.
Keyboard Shortcuts
- Arrow Keys move the planes in the 3D section view.
- ",", and "." Change the current slice. Moves the X-Y plane up and down in 3D section view.
- "f,b" Moves a timestep forward or backwards.
- "Esc" Cancels deform snake operation.
- "n" Selects the 'next' snake.
- "v" Cycles to next panel view.
3D Controls
- Rotate Scene To rotate a 3D scene hold down the left mouse button, and move the mouse.
- Move Center of Scene To move the center of the scene hold down the right mouse button and move the mouse.
- Zoom In / Out The scroll wheel will zoom the scene in and out.
Parameters
- Alpha: Alpha determines the elasticity of the snake.
- Beta: Beta determines the bending stifness of the snake. Large beta can cause a snake to grow.
- Gamma: Gamma restricts the distance by which the snake moves during a deformation step.
- Weight: Weight changes the level of influence the image has.
- Stretch Force: A factor to adjust the pulling force.
- Deform Iterations: Number of iterations per deform snake click. Esc will stop.
- Snake Point Separation: The distance between sampling points along the snake in pixels.
- Image Smoothing: The width of the Gaussian filter that is applied to the image.
- Z Spacing: Distance between z planes in x-y pixels. Changing this value will cause the 3D image to reload.
- Foreground: Intensity value of a point on the filament.
- Background: Background intensity. The snake will shrink/grow when the tip of the snake is at a point whose intensity is less/greater than the mean of the Foreground and Background intensities.

Department of Physics, Lehigh University
Department of Computer Science and Engineering, Lehigh University